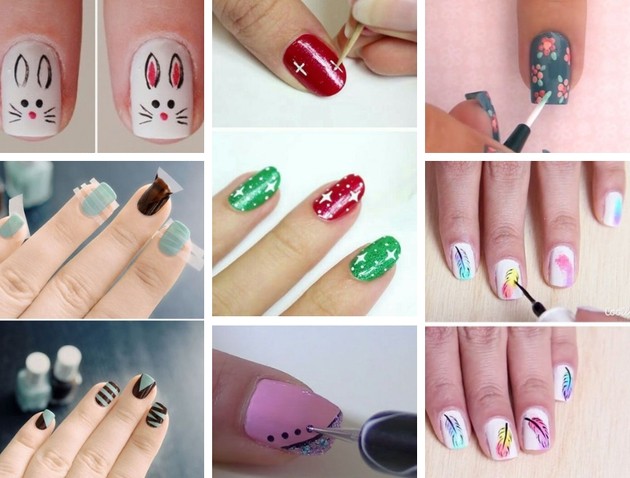
Do you want to learn step by step how to make decorated nails at home? Well, just know that it only takes a little training, dedication and the right material, that in no time you will be making beautiful drawings to have amazing images at your fingertips. Watch 10 tutorials and start risking your favorite today!
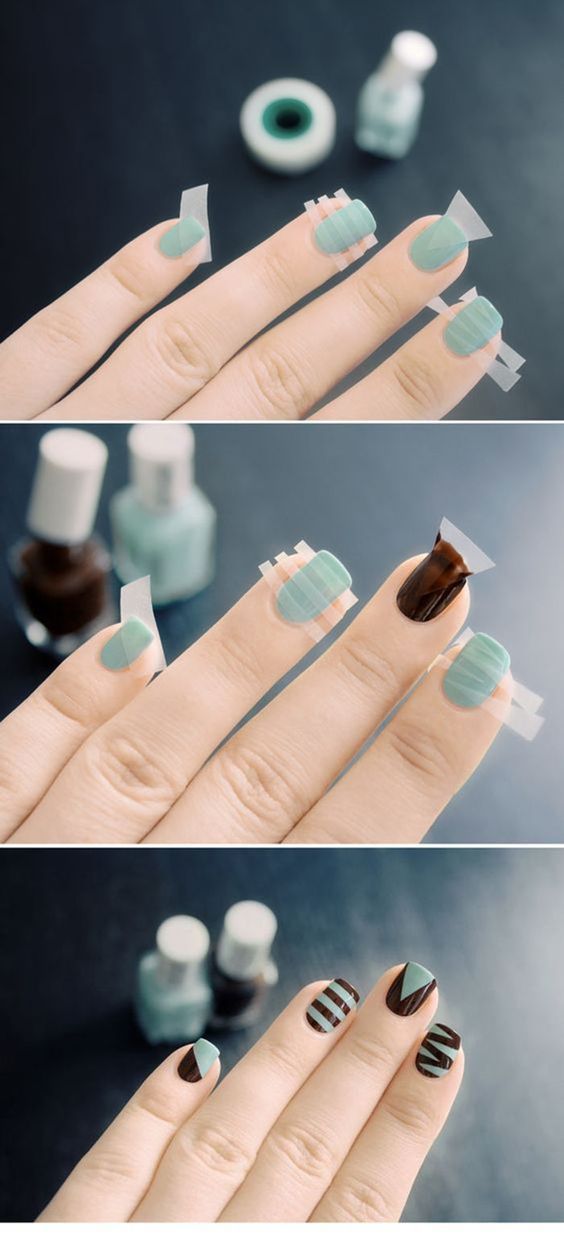
1 - Nail art: step by step for geometric lines
It's easier than you think! Paint your nails in a desired color that will be the base of your design. After the nail polish has dried well, apply clear tape forming the geometric lines you want. Then go over another color, preferably a contrasting one, and wait for it to dry. When it is dry, remove the adhesive tapes and you're done!
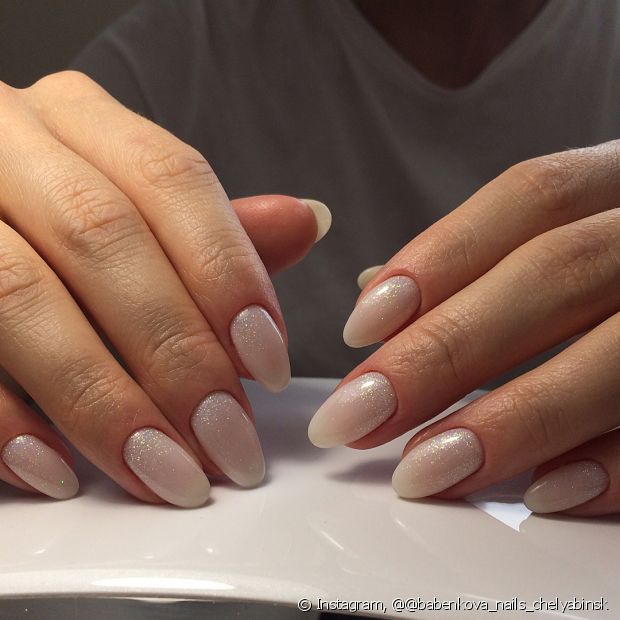
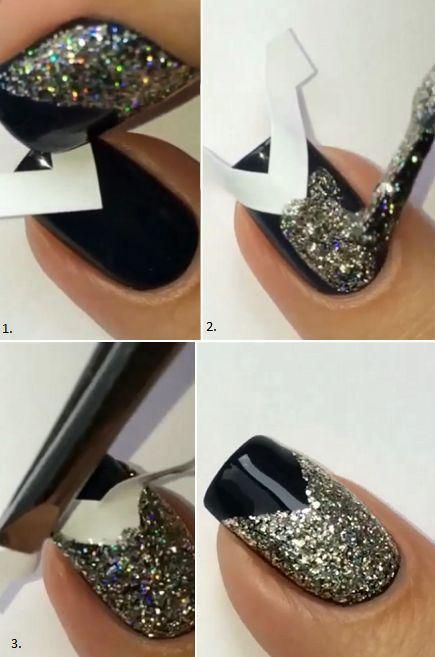
2 - Decorated nails: step by step to apply glossy nail polish
Follow the same logic as the previous tutorial, but add a good dose of glitter. You can do this application on just one nail, use the same design for all of them or vary the geometric shapes - the choice is yours and the result is pure glamour!
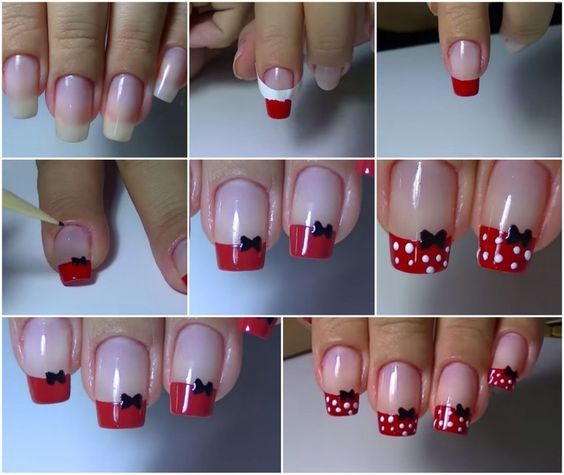
3 - Decorated nails: step by step for the Minnie style
Apply a light base coat and make the francesinha with red nail polish. Once dry, take a toothpick and dip it in white fabric paint to make the balls. With a black fabric paint, make the bow on the nail polish spacer. To finish, apply another coat of extra glitter.
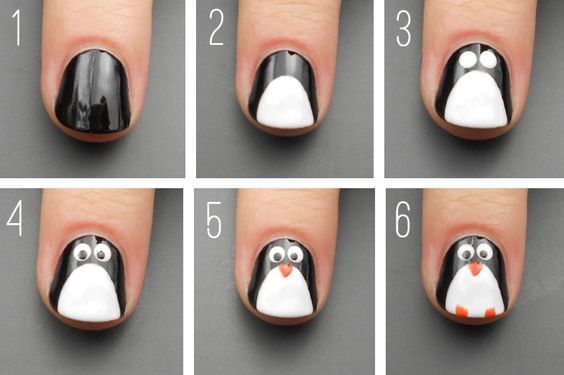
4 - Decorated nails: step by step to make a penguin
Paint the nail with a black nail polish and wait for it to dry. Then, from the center to the tip of the nail, apply a very thick white nail polish. With the help of fabric paint and a very thin toothpick, make the eyes, the pout and the feet. Finish with an extra coat of glitter to make the design last longer.
See encapsulated nails ideas for fun!
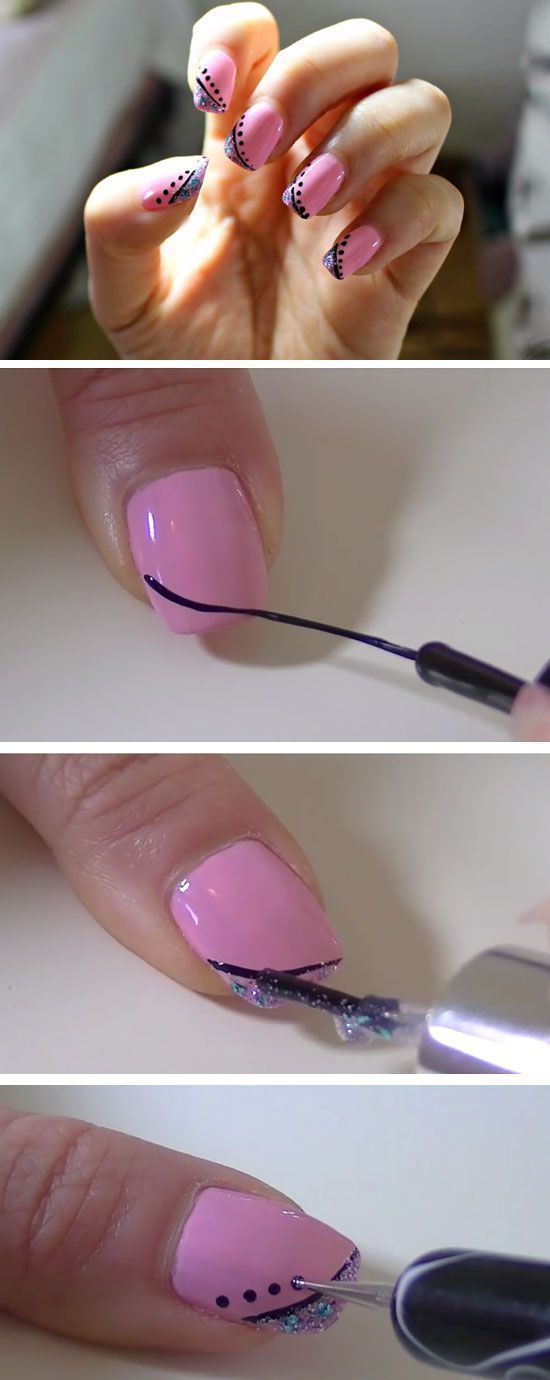
5 - Decorated nails: step by step to design with sparkles and polka dots.
For this look, paint your nails with the base color and wait for it to dry. Then take a thin brush and make a rounded line with black fabric paint, crossing the entire top of your nails. Wait for it to dry and apply a glossy nail polish on the tips of the nails. To finish, use a baller or a toothpick to make the polka dots.
What is, how is it done and what are the benefits of nail shielding?
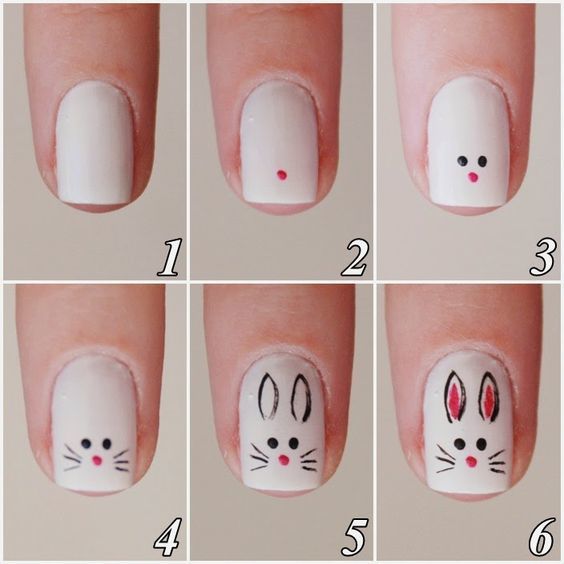
6 - Decorated nails: step by step to make a bunny rabbit
Paint the base of the nails with a white nail polish and wait for it to dry. Then dip the tip of a toothpick into the pink nail polish and lightly touch the nail. Just above, make the eyes with black nail polish. Use a thin brush to make 3 black lines on each side of the pink ball. For the ears, make two risks, like brackets, one in front of the other and finish with pink nail polish inside.
Gel nails: everything you need to know about the technique that became popular
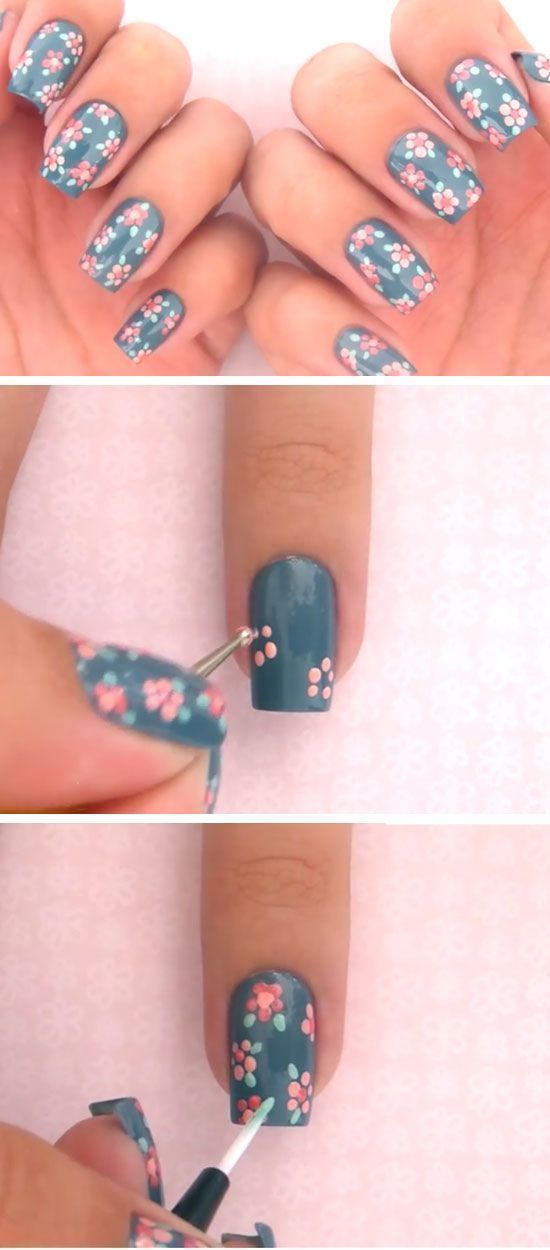
7 - Decorated nails: step by step to draw flowers
This drawing requires a little more skill and concentration, so it's worth trying just one flower first and, if it works, do others! Go for a matching palette of glazes and use suitable materials, such as a baller and fine brushes. First make the little balls that will be the petals. In the middle, with another color, make the center. In the surroundings, decorate with the green icing, just like the foliage.
Stiletto nails: everything for those who want to have style at their fingertips.
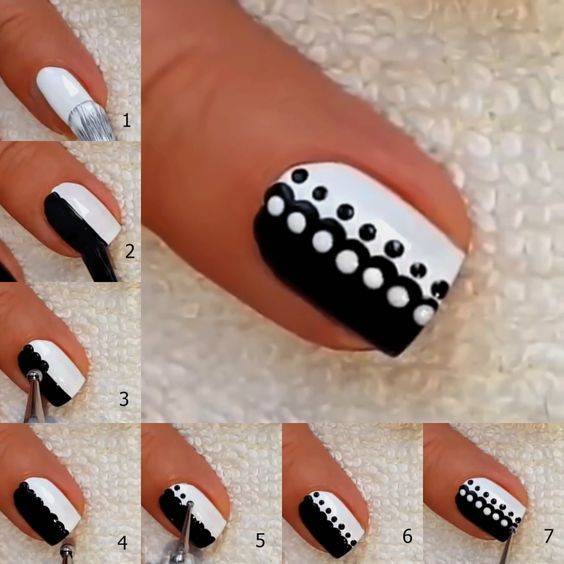
8 - Nail art: step by step in black and white
Paint your nails white and, when they are dry, apply black nail polish only halfway. Then use the curler to create waves from the base to the top of the nail. Then make the black balls on the side of the wave. Wait for it to dry and repeat the operation, this time with white nail polish over the black painted area.
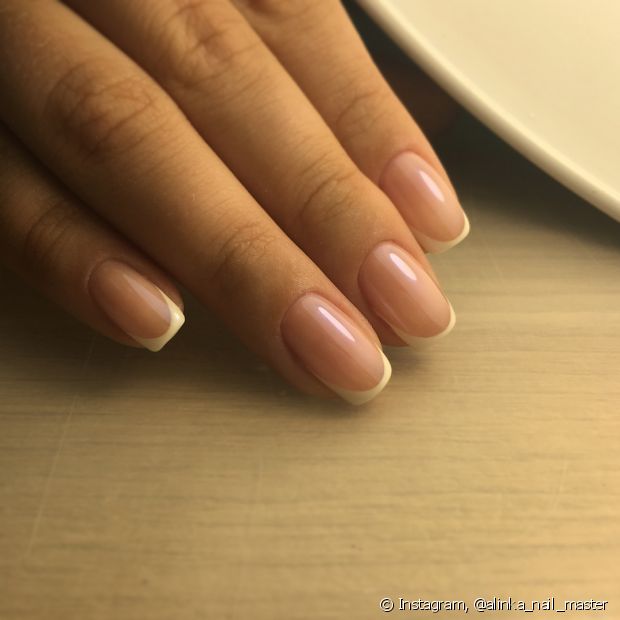
Discover different models of French nails
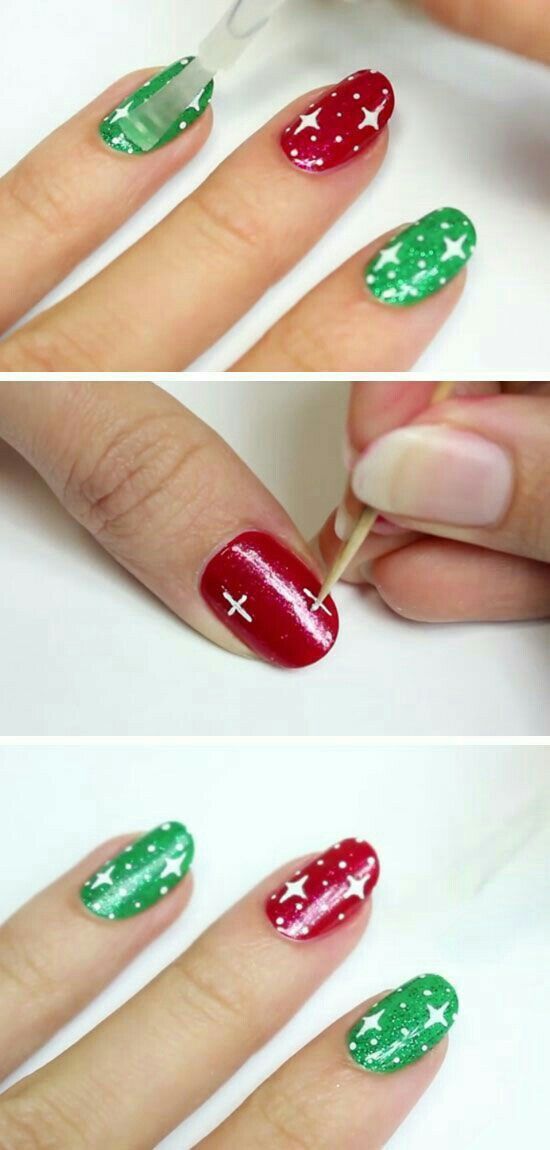
9 - Decorated nails: step by step for Christmas
The idea is very simple and creates a super appropriate look for the Christmas atmosphere. Alternate the color of your nails with green and red nail polish. When they dry, use white fabric paint and a thin toothpick to make the crosses and polka dots and you'll be ready to wait for Santa Claus!
Get inspired with 9 styles of decorated gel nails
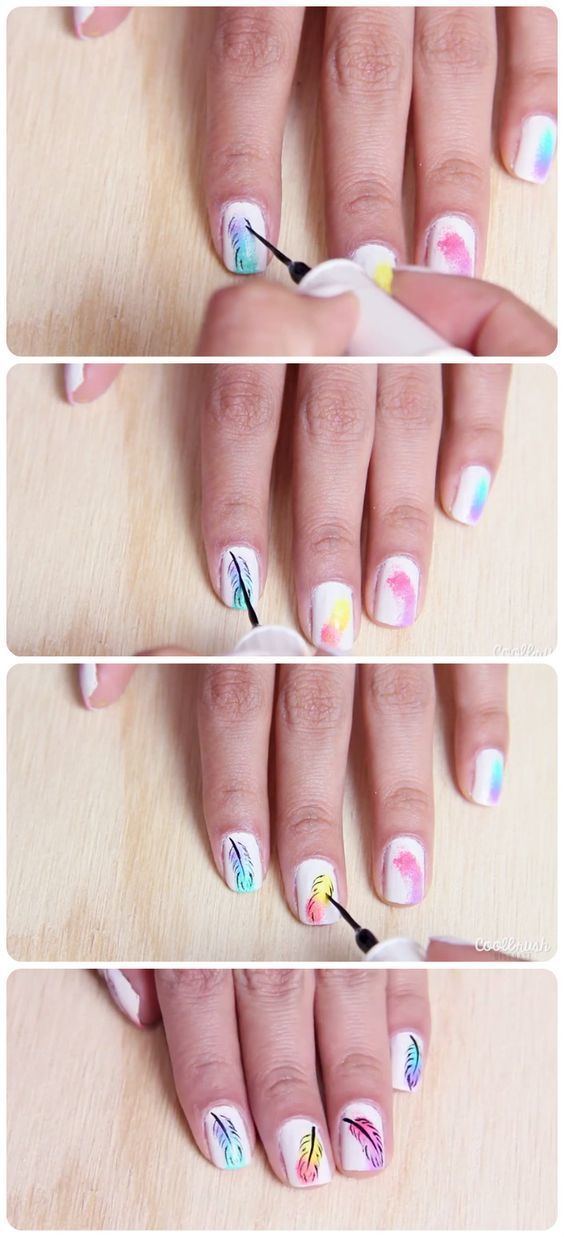
10 - Decorated nails: step by step to draw feathers
Paint the base of your nails white. Take a small foam makeup and cut it into several pieces. Apply two colors of nail polish on each piece and apply it on the nails to get that stained watercolor look. Then use a thin brush and black fabric paint to draw the feathers. It's a bit more elaborate, but the result is worth it!